
Setting Up Your Farallon Netopia Router
for Office Online
Connecting to Your Router
In order to configure your router, you must first connect
to it.
You have two options: You can telnet to it from another
machine
on your network, or you can connect it to a Mac or PC with
a serial
cable and use a standard terminal program to communicate
with
the router.
To do the former, the machine you wish to use must be
configured
to communicate to the router using TCP/IP over your local
area
network (configuring your LAN is beyond the scope of this
document
and the help that Northwest Nexus can give you). The
router's
address, if preconfigured by us, will be 10.0.1.1.
If you wish to try the latter, you'll need an appropriate
serial
cable and a terminal emulation program. "Windows
Terminal" or
"HyperTerminal" will work under Windows and
Windows 95; on a Macintosh,
a program such as "Zterm" or "Mac Comm
Center" will be fine. Set
the program to use 9600 BPS, 8 data bits, no parity, and 1
stop
bit. Tell the software to connect, and you should be set
to go.
Configuring Your Router
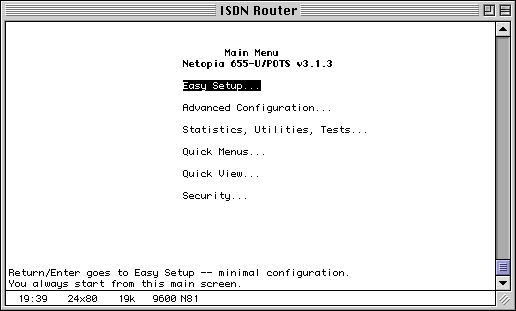
- Once you have connected, you should see the
main Farallon menu,
as shown below. Select "Easy Setup" and
press return.
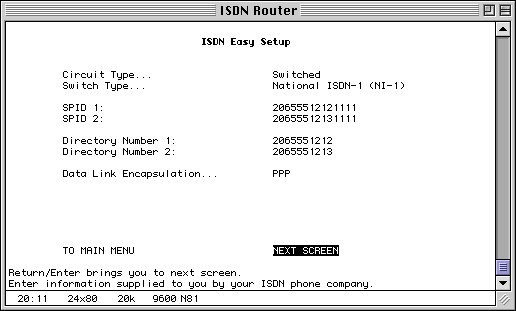
- Fill out the screen that appears with your
SPID numbers and your
ISDN phone numbers -- your ISDN provider should
have given you
both pairs of numbers, plus the appropriate switch
type. When
you're done, select "Next Screen" and
hit Return.
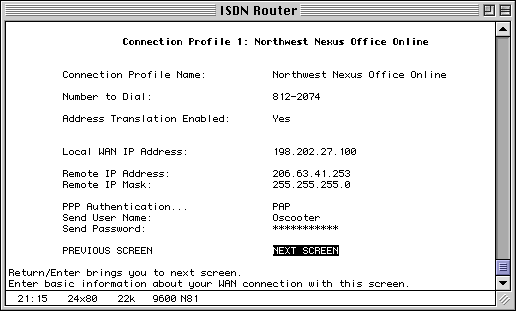
- Fill out the next screen as follows. You
will
be provided with
the Number to Dial, Local WAN IP Address, Remote
IP Address, User
Name, and Password. All other information should
be entered as
shown below. For routers with Firmware revision
3.1.3 or 3.3 and higher, the Local WAN
IP can be left at 0.0.0.0. However, for customers dialing into our Ascend
equipment, you'll need to put the correct Local WAN IP there.
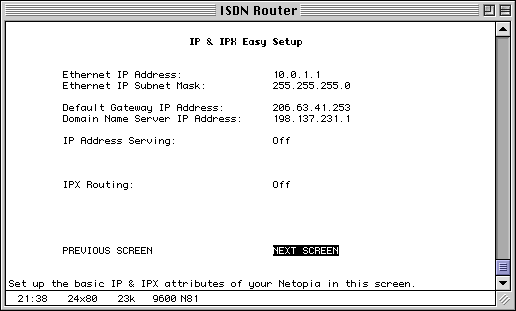
- Again, fill out the screen as shown below;
then select "Next Screen"
and hit return. The Default Gateway IP Address
should match the
Remote IP Address you used on the previous
screen.
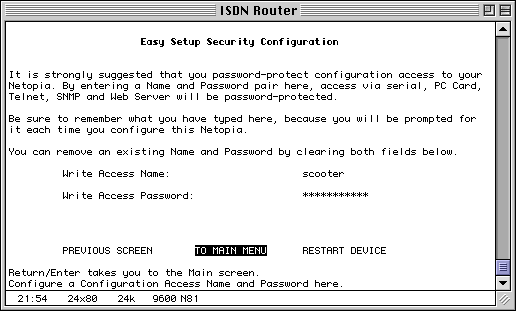
- Enter a user name and password to protect your
router from outside
access. You may use anything you like. Select
"To Main Menu" and
hit return.
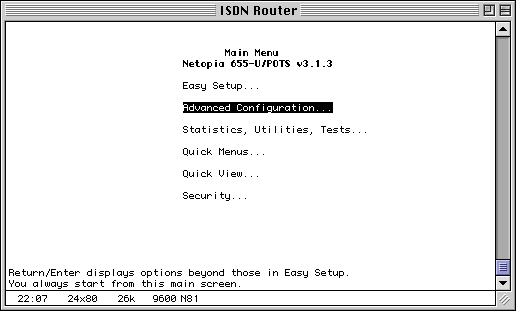
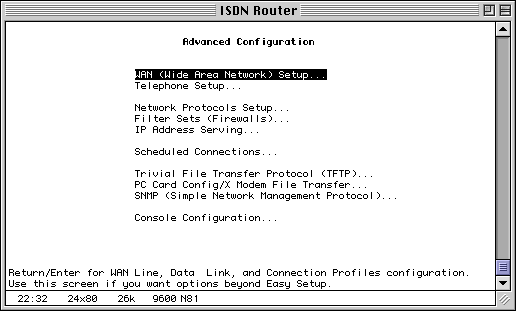
- Select "Advanced Configuration..."
and press return.
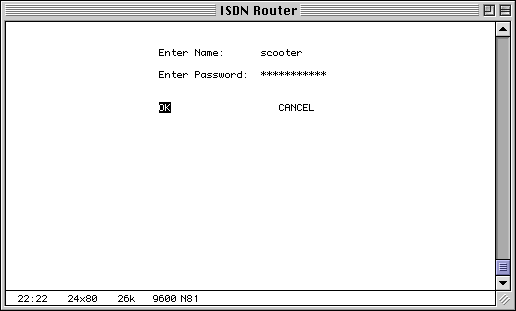
- You'll need to enter the User Name and
Password you selected in
Step 5 from now on to enter configuration screens.
Do so, then
select "OK" and hit return.
- Select "WAN (Wide Area Network)
Setup..." and press return.
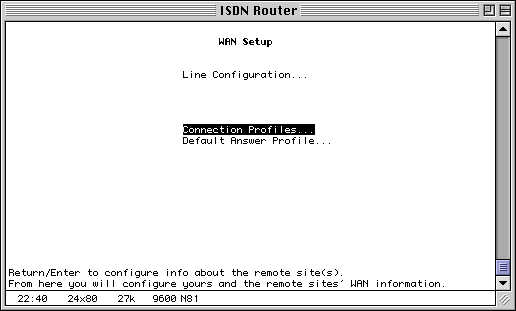
- Select "Connection Profiles..." and
press return.
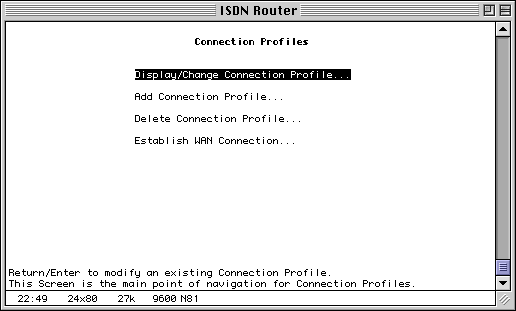
- Select "Display/Change Connection
Profile..." and press return.
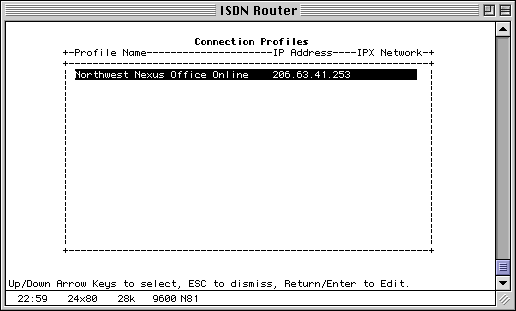
- Select your Office Online profile name and
press return.
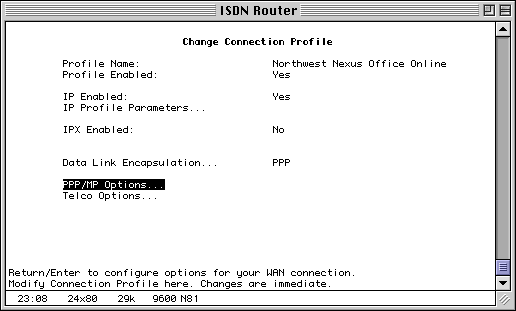
- Select PPP/MP Options (or Data Link Options
for routers with the more recent firmware) and
press return.
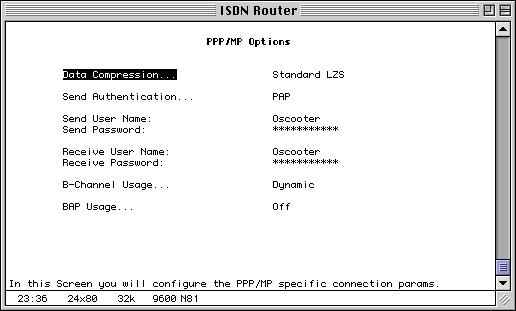
- Configure this screen as shown here. The only
variations will
be the User Names and Passwords, which will be
provided by Northwest
Nexus. Use the same User Name and Password for
both the "Send"
and "Receive" fields. When you're done,
hit "Escape" to return
to the previous screen.
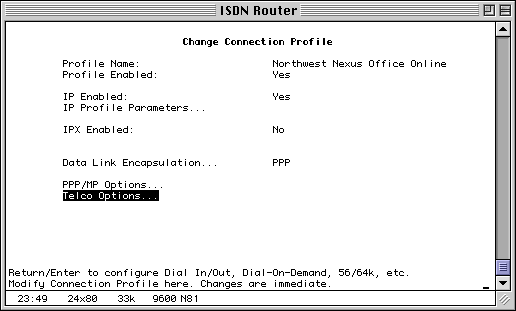
- Select your "Telco Options..." and
press return.
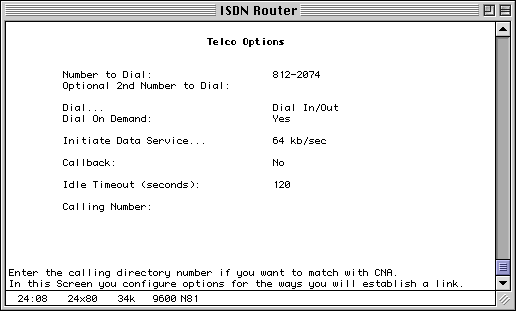
- Change the "Idle Timeout" setting on
this screen to 120. Then,
hit "Escape" several times until you
have returned to the "Advanced
Configuration" menu.
- Select "Network Protocols Setup..."
and press return.
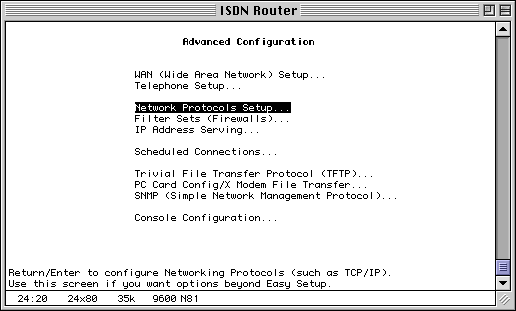
- Select "IP Setup..." and press
return.
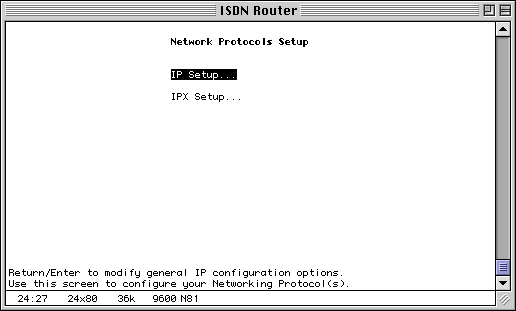
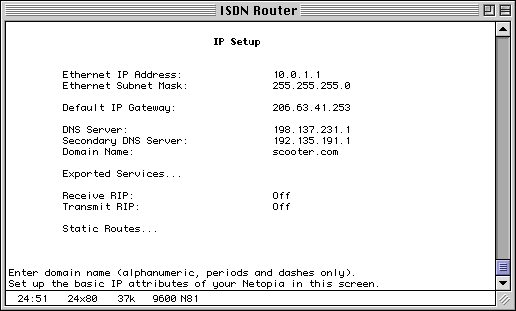
- Enter the Secondary DNS Server address and
your Domain Name. When
you're finished, hit "Escape" until you
have returned to the Main
Menu.
- Your configuration is complete -- all that
remains is to restart
the router to make all your changes take effect.
Select "Statistics,
Utilities, Tests..." and press return.
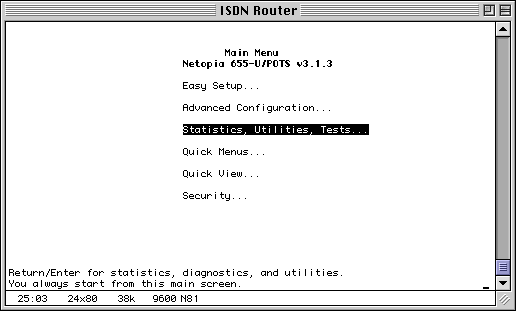
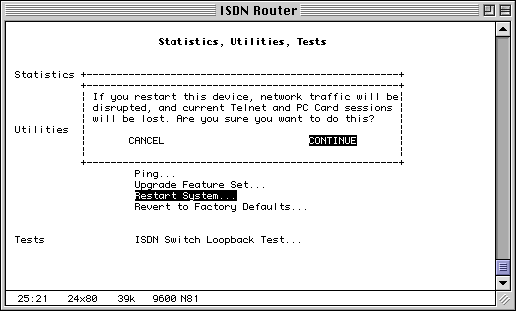
- Select "Restart System..." and press
return.
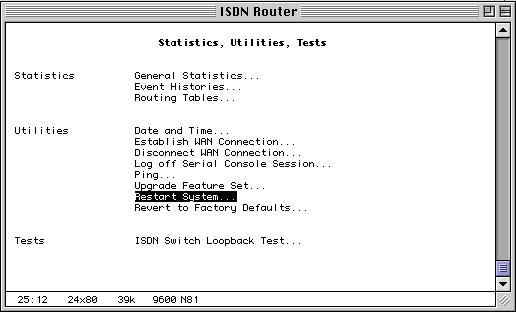
- Finally, select "Continue" to
confirm that you want the router
to restart, and hit return. Once the router
restarts, you should
be all set.
