
Setting Up Open Transport for Northwest Nexus
Obtaining the Appropriate Software
Open Transport is the new networking software for the Apple Macintosh
and Macintosh clones running Mac OS. PCI-based Macs, such as the
7200, 7500, and 8500, require Open Transport. It is an option
for all other Macintoshes running System 7.5.1 or higher. Open
Transport is included in Mac OS 7.6 and higher, and is required
under Mac OS 8.
Early PCI Macs shipped with Open Transport version 1.0.6. This
version is not adequate for dialup Internet connections. Version
1.1.1 or higher is required for dependable connections with Open
Transport. We cannot guarantee successful connections with versions
of Open Transport lower than 1.1.1.
We recommend that all Power Macintosh users, and all users of
any Macintosh with 8 megs or more of RAM and running System 7.5.1
or higher, upgrade to Open Transport. You can download a current
version of Open Transport from Apple:
Once you have obtained the installer, install the software as
per Apple's instructions and restart your machine.
Configuring Open Transport
- Pull down the Apple Menu and open your Control Panels folder.
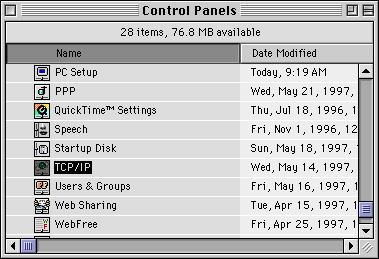
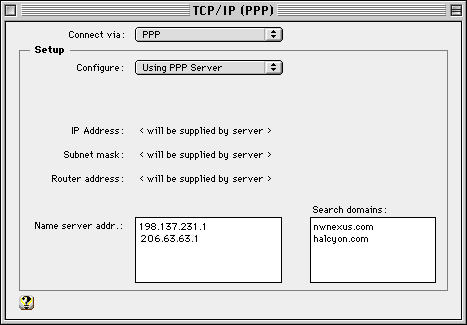
- Locate the control panel named "TCP/IP" and double-click on the
icon. The following dialog will appear. Fill it out to match the
picture.
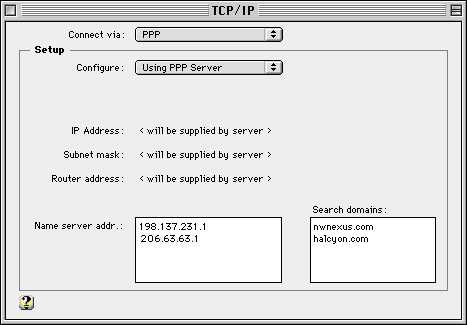
- Close the control panel and allow it to save your changes, and
you're finished.
Setting Up Multiple Configurations in TCP/IP
In certain situations, you may wish to have more than one TCP/IP
configuration preset on your machine -- for example, if you have
a TCP/IP ethernet network that requires different settings than
your dialup account, or an additional dialup PPP account. It is
simple to create multiple configurations for TCP/IP and switch
between them at will. These instructions will show you how to
add a PPP configuration to a Mac that is already set up to use
TCP/IP on an ethernet link.
- Pull down the Apple Menu and open your Control Panels folder.

- Locate the control panel named "TCP/IP" and double-click on the
icon.
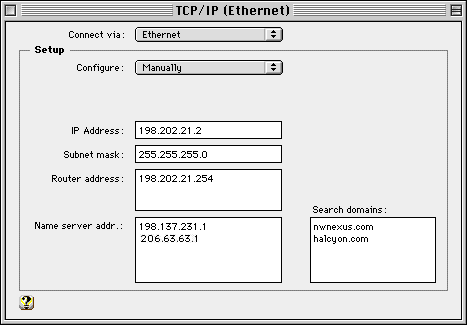
- Pull down the File menu and select "Configurations".The following
window will open. Highlight your current configuration and click
on the "Duplicate..." button.
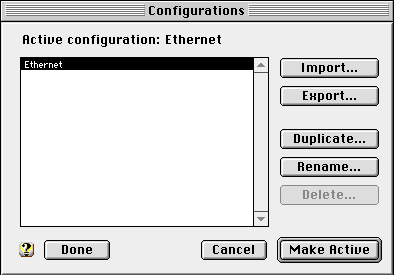
- Enter the name for your new configuration. Anything that makes
sense to you is fine. When you're done, click the "OK" button.
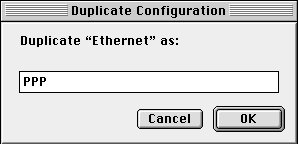
- At this point, you should see both configurations in the window.
Select your new configuration, and click the "Make Active" button.
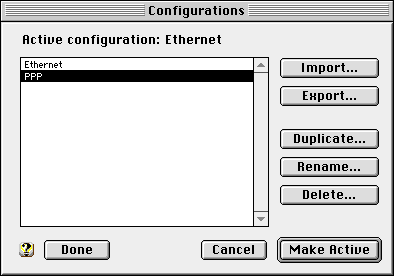
- You can now set up your configuration as necessary. When you need
to switch between configurations, simply open the "Configurations"
window, select the one you want, and click "Make Active".
